
How to Install Solar Panels

There are now well over 1 million homes with solar power in the United States. The number of installations doubled in 2016, compared to 2015, accounting for 40 percent of new power generation. That was more growth than any other means to generate power, including fossil fuels. Although solar panels generally look simple, installing a system requires a lot of planning and work that a DIYer may not be equipped to handle.
Most of the time, the path towards going solar begins with signing a contract. There are many solar contractors in the U.S. with varying experience, reputations, and work records. If you familiarize yourself with licensing and industry certifications, you can identify companies that can provide you with the right results. There were over 9,000 companies employing 260,000 people in 2016, according to the Solar Energy Industries Association. Its Installer Safety & Workforce Development Working Group provides access and guidance regarding certifications and training opportunities.
Some of the leading certifications/training include:
- PV Installer Certification, accredited by the American National Standards Institute.
- Roof Integrated Solar Energy Program, which certifies installers (from the National Roofing Contractors’ Association).
- Solar Thermal Installer Certification, from the North American Board of Certified Energy Practitioners.
- Interstate Renewable Energy Council accredited courses using the Institute for Sustainable Power Quality framework.
- Solar Instructor Training Network, sponsored by the U.S. Department of Energy, which teaches instructors how to align courses with standards.
However, due diligence just barely scratches the surface. Once you sign a contract, it can take up to three months (EnergySage) before a residential solar system is connected to the grid, and ready to power your home.
Considerations
The installer often works together with an engineer. Their job is to evaluate the structural condition of the roof, and the condition and age of the electrical panel. Oftentimes panels need to be upgraded to handle the amperage and current generated by the solar system. A general site visit may also be conducted to look at the roof type and angle, any shading present, and to determine the optimal system size.
Sizing: This is a major step to installing solar panels. The size is determined by what your home can handle and how much power you expect to get from the system. You might figure this out by calculating the percentage of total electricity needed from the photovoltaic system. Looking at past electric bills and contacting a utility to identify usage in kilowatt-hours can help in this area. Rated power output ranges from 1 to 5 kilowatts for most homes and small businesses.
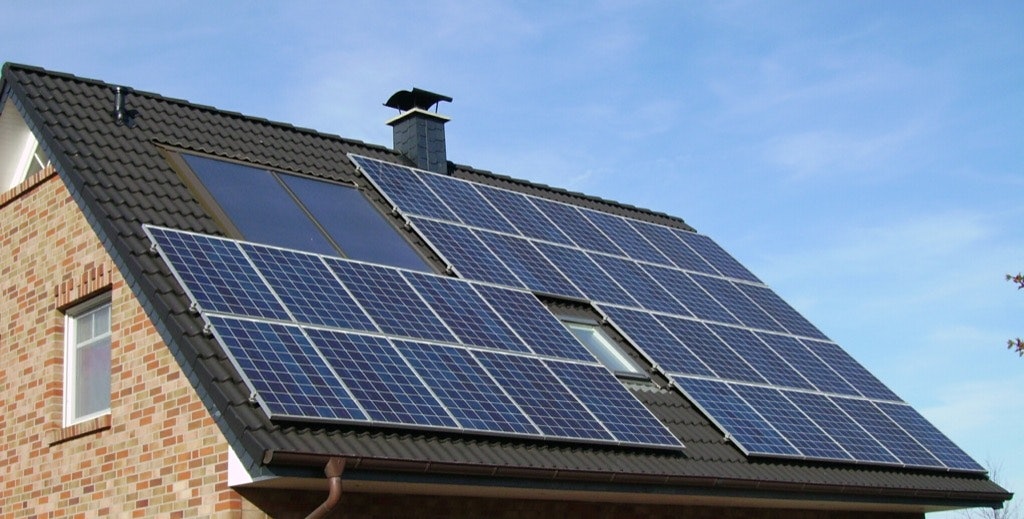
Site/orientation/tilt: These are factored when determining the size, but consider things like the type of roof and what direction it faces. Solar panels should be oriented in the direction they receive the most energy, on a daily and seasonal basis. The best position is true south for modules in the northern hemisphere, but they can face as much as 45 degrees east or west, and performance will still be sufficient. Most of the time, PV modules are mounted flat. They’re on the same tilt as the roof surface. However, the best angle depends on latitude, and both are usually not the same. Contractors, therefore, need to include the angle in performance and size calculations.
Professional Installation vs. DIY
There are important steps such as engineering, permits and other documents, ordering equipment, and installation adhering to local government, utility, and safety standards. Local representatives must inspect the system to approve the installer’s work. People are often unfamiliar with the application process for federal solar incentives, and the provisions of building permits are often hidden in fine print. For example, there must be three feet of space on a roof surrounding solar panels, in some states. Other jurisdictions allow panels to be installed on the entire roof surface.
Ordering equipment is another challenge. The optimal PV panels are not the only things you’ll need. Inverters, power meters, wiring, and other components come with different operating parameters, ratings, and efficiencies. A professional installer can recommend a particular type and brand. Installation day is a whole different beast. Roof preparation, attachments, racking, and safety are considerations that cannot be ignored. It may take 1 to 3 days to install the complete system. An inspector from your local government must then check that applicable codes and electrical standards are met.

Installation Process
- Check that the roof can handle the size and weight of the photovoltaic system.
- Make any structural adjustments and seal any roof penetrations before work commences.
- Follow manufacturer specifications and procedures, and ground system parts to prevent shocks and surges.
- Ensure the system is operating properly and meets local utility requirements.
Of course, the process is more complex than this. Site drawings and diagrams are required as part of permit packages before a utility contract can be signed. During the installation phase, you’ll need to submit the permit materials to the appropriate agency, and receive the permit before starting construction. Each piece of equipment, when it is received, must be checked for damage. If installing the system yourself, carefully read the instructions for each component and regarding every step of the process.
Other steps include estimating wire lengths from the modules to the inverter and combiner, factoring in the ampacity of array circuits. The maximum voltage drop at full power must be 3 percent or less, from the modules to inverter. Sizing the wiring correctly will ensure the system stays within these parameters. You’ll also need a properly sized service panel and a critical load panel (or battery standby system) that is linked to the right circuits.
Mounting a PV array requires structural preparation, checking the open circuit voltage and short circuit current of each solar module, connecting panels using plug connectors, and ensuring the array is properly secured to the support structure. There are even more parts of the system, and steps to installing it, than these. The Solar Electric System Installation Checklist from a California Energy Commission guide provides detailed insights regarding design, installation, calculations, and how you can estimate energy savings, take advantage of the best mounting options, and maximize safety.
Sources: CNBC, Energy.gov, Energy Sage, Energy.ca.gov, SEIA